AR-196 ARADO A-3
DIORAMA BUILD
Materials/tools used
Kit: 1/72 scale Airfix AR-196
Arado A-2/A-3 (A02019)
Diorama Base: ½ inch Plywood and expanded
polystyrene with plaster of Paris
Water effects: Casting Craft 2 part polyester
resin and Liquitex Heavy Gloss Gel
Ground materials: Woodland Scenics
Paint: Testors enamels (Aircraft and
figures) and Tamiya/ other acrylics (diorama)
Sandpaper: 800 grit wet/dry paper
Figures: Airfix RAF ground crew (converted to
Luftwaffe) set A01747
Introduction
I love float planes and having bought the kit, decided to do
a water diorama based on the WW2 pictures of 2./ Aufkl. Gr. 125 at Suda bay, Crete in 1943 (only because I liked
the bright yellow wing tips). Having created a previous water diorama of
a TBF Avenger, I felt happy to give it another try. The diorama won 1st at IPMS Ottawa local meeting.
OVERVIEW OF THE BUILD
Interior
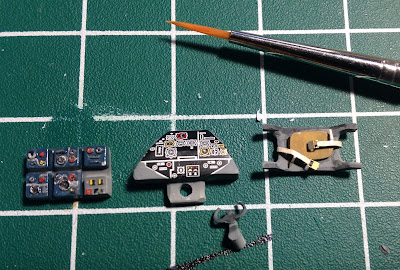
The Airfix Arado kit doesn’t come with and cockpit
floor, just some seats and bulk head between the pilot and observer/ gunner so
I put in a styrene floor, gunner seat and some photo etch seat belts. For the
observer radio I used an old JU-88 radio set which is the same basic type and
trimmed it to size. The stock control panel and decal is a bit clunky but had
to do for now. I also used a better detailed MG-13 from the JU-88 set and
scratch built the MG swivel mount in the observer compartment.
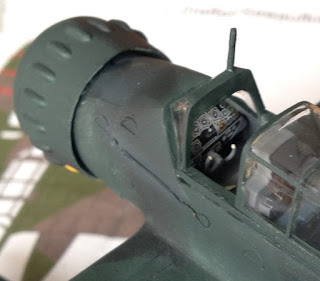
After installation and painting and shading it fit
ok. With the canopy attached, visibility is fairly limited anyway. The fuselage
fits pretty well together and only needed a bit of filler and CA glue along the
seams – nothing major.
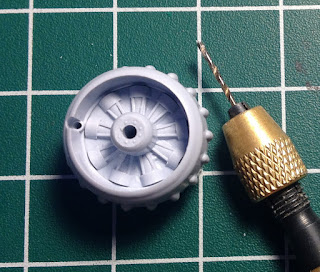
As this is a simple kit, the stock radial engine is
fairly low on detail and is inserted through the back of the cowling. I drilled
out the forward facing MG barrel opening and added two air filters to the top
of the engine. The large propeller nose cone will cover a lot of the detail
anyway. I painted the engine in Humbrol gunmetal and then scratched off some of
the paint along the piston heads and rods for weathering.
Fuselage
& Wings
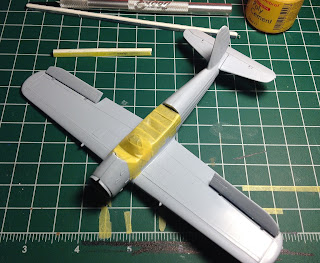
The wings and fuselage fits well in this kit
although the elevators and ailerons are a bit large and clunky and needed
gluing in the up, down or level position. The fuselage has a lot of raised
panel lines but are not horrific although the cockpit section lacks some detail
such as the engine exhausts. Joints at the wing roots are clean and did not
need a great deal of filling or sanding. I added the crane hoist cables on the forward
part of the fuselage using thin copper wire from inside electrical flex.
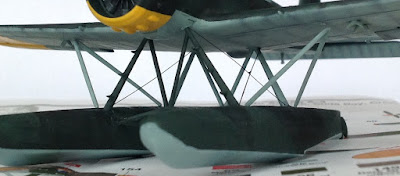
I made the decision to assemble the floats and
struts and rig them before attaching to the fuselage. After much testing
of the rigging (I used stretched sprue), to avoid sagging after gluing to the
fuselage I attached the finished assembly and painted the rigging with well diluted
black enamel.
Since the diorama included a bomb trolley, I cut
the kit 250lb bombs off of their brackets and sanded everything down to a
rather basic bomb clamp shape under the wings.
Painting &
finishing
The red propeller spinner was neatly painted using
a drill bit size gauge as a mask which worked out well and better than using
masking tape.
The kit decals were well done as are the newer Airfix
types with small edging. The fuselage crosses and letters needed a few coats of
Microsol to soften them up to fit over the molded fabric and rib detail.
Creating
the Diorama
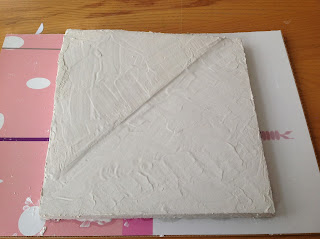
The diorama base was made from 8 x 8 inch plywood (1/2 inch
thick) and the beach section made from a sanded and cut block of expanded
polystyrene (although in future I wouldn’t use this with the polyester resin
due to several accidents where the styrene dissolved. I used a thin crust of Plaster
of Paris painted over the beach for texture and painted the surface in acrylic
paint (I forgot to seal the paint with clear gloss which reacted with the resin
turning the colour a bright yellow/ green).
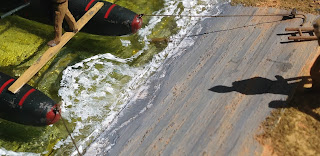
I used a mix of grey acrylic paint and masking tape to
create the concrete launching ramp (the tape used to affect raised ribs) and
added small stones and fine sand to the areas below the water line glued with
Woodland Scenics spray glue.
The jetty was made from thin balsa wood sanded with fine
paper and glued with white wood glue in individual planks and support pillars
(made from cocktail sticks). Woodland Scenics pine tree bush (painted sponge
really) was used as seaweed clumps on top of the darker green painted sea
floor.
Water Effects
After all the work on the Arado and the diorama, the time
came to add the resin water. You can always use Woodland Scenics water effects
but it isn’t as good for optical clarity or layering as the polyester type.
Casting Craft polyester resin is a two part type that requires absolute and
exact measurements of each part in order to work well, not crack, heat up or
deform the diorama so it is worth testing before hand on a mini diorama!
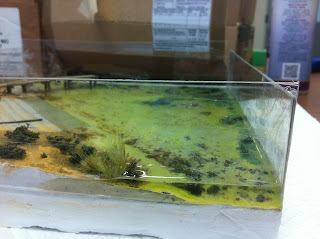
First clear acrylic walls were taped to the sides of the
base and made water tight (otherwise the resin will escape). Clear acrylic is
good to check the filling progress. Avoid using thin plastic as it will heat up
and warp (1/8 inch min is best, although the sturdier the better). I used food
colouring (blue and green) to tint the mixture (Hint: the colour will always
look darker in the pot and lighter once poured into the diorama)
Once poured, the resin needs to
be prodded with a stir stick to soften the shore line of the water.
Once the aircraft is placed in the water, I raided the tail
up slightly and poured the rest of the resin so that it “floated” realistically
and didn’t rest on the sea bed.
The resin will naturally dry either in ripples, or perfectly
flat depending entirely on the heating effect, mix ratio and other black magic
that I’ve yet to perfect although the end result was better than I could have
planned. I used a stir stick to raise the resin up in soft peaks as it is
setting to make ripples and waves on the shore and around the floats.
The waves and froth at the shore and around the dock was
created using Liquitex Heavy Gloss Gel (from
artist stores) which goes on like thick acrylic paint but dries clear. Once
dry, the gel was painted with white artist’s acrylic paint and then coated with
future to get a gloss wet shine.
Diorama Detail
Figures. The 5 figures are all re-purposed from the
Airfix RAF ground crew set and made from older plastic that doesn’t sand at all
well and have large flash and mold lines down each leg and arm which are hard
to remove. They are simply tan painted and detailed although actual Mediterranean
Luftwaffe wore mostly shorts and short sleeve shirts. The trolley is a modified
RAF starter cart to carry the 250 lb. bombs cut off of the Arado kit.
Launch Ramp. I
used fine electrical copper wire to make eyelets for the rope on each float and
set into drilled holes with CA glue then painted with Testors aluminum paint.
The bollards set into the ramp are the butts of 1/35 scale Tamiya Sten guns
glued into the ramp and stained with rust paint and a mixture of thinners and
Valejo brown wreathing pastel.
Dock Detail. The dock was made from individual planks
cut from thin balsa wood sheet, fine sanded with 800 grit paper and glued
together with white glue. It was painted with thinned Tamiya acrylic paint to
show the wood grain. Un-thinned paint was used to detail the rusted nails.
Foliage.
The foliage (Grass: T42 fine turf earth; Reeds: FG173 Field
Grass; Bushes: Realistic Tree Kit) in the diorama is from Woodland Scenics.
Acrylic paint was used to highlight the bushes to a more dried Mediterranean
look.
Conclusion
Overall this was a very nice kit to build even though it is
an older 1966 Airfix mold. Decals are new in 2011 and they show well. The
plastic is nice and hard, easy to trim and sand with limited flashing and minor
parting mold lines. Resin water is definitely an acquired art and it’s highly
recommended to practice on smaller (2-4 inch size) dioramas to test the drying,
layering and surface effects.












Hey I’m Martin Reed,if you are ready to get a loan contact.Mr Benjamin via email: 247officedept@gmail.com ,WhatsApp:+1 989-394-3740 I’m giving credit to his Service .They grant me the sum 2,000,000.00 Euro. within 5 working days.Mr Benjamin work with group investors into pure loan and debt financing at the low ROI to pay off your bills or buy a home Or Increase your Business. please I advise everyone out there who are in need of loan and can be reliable, trusted and capable of repaying back at the due time of funds.
ReplyDelete